
How to Add A New Contact to Your iPhone Address Book Using iCloud (Mac or PC)
Here's an easier way to add contacts to your iPhone using squinting or tapping your screen. Use your computer and iCloud.com to quickly update your address book.

Many people assume they need to use their iPhone to manage contacts. Still, there’s actually a much easier way if you don’t want to do a bunch of tapping on your iPhone, especially if you prefer a bigger screen and using a keyboard. Although there are a couple of extra steps, it’s easy.
Signing into iCloud.com on a computer allows you to view your entire address book and add new contacts with just a few clicks. Once complete, the new contact will automatically appear on your iPhone within a few minutes.
This guide walks you through each step of the process, using Firefox as the browser, but any browser will work. I’m using a Mac for this, but the process is the same on the PC once you open the browser.
Step 1: Open Firefox and Go to iCloud
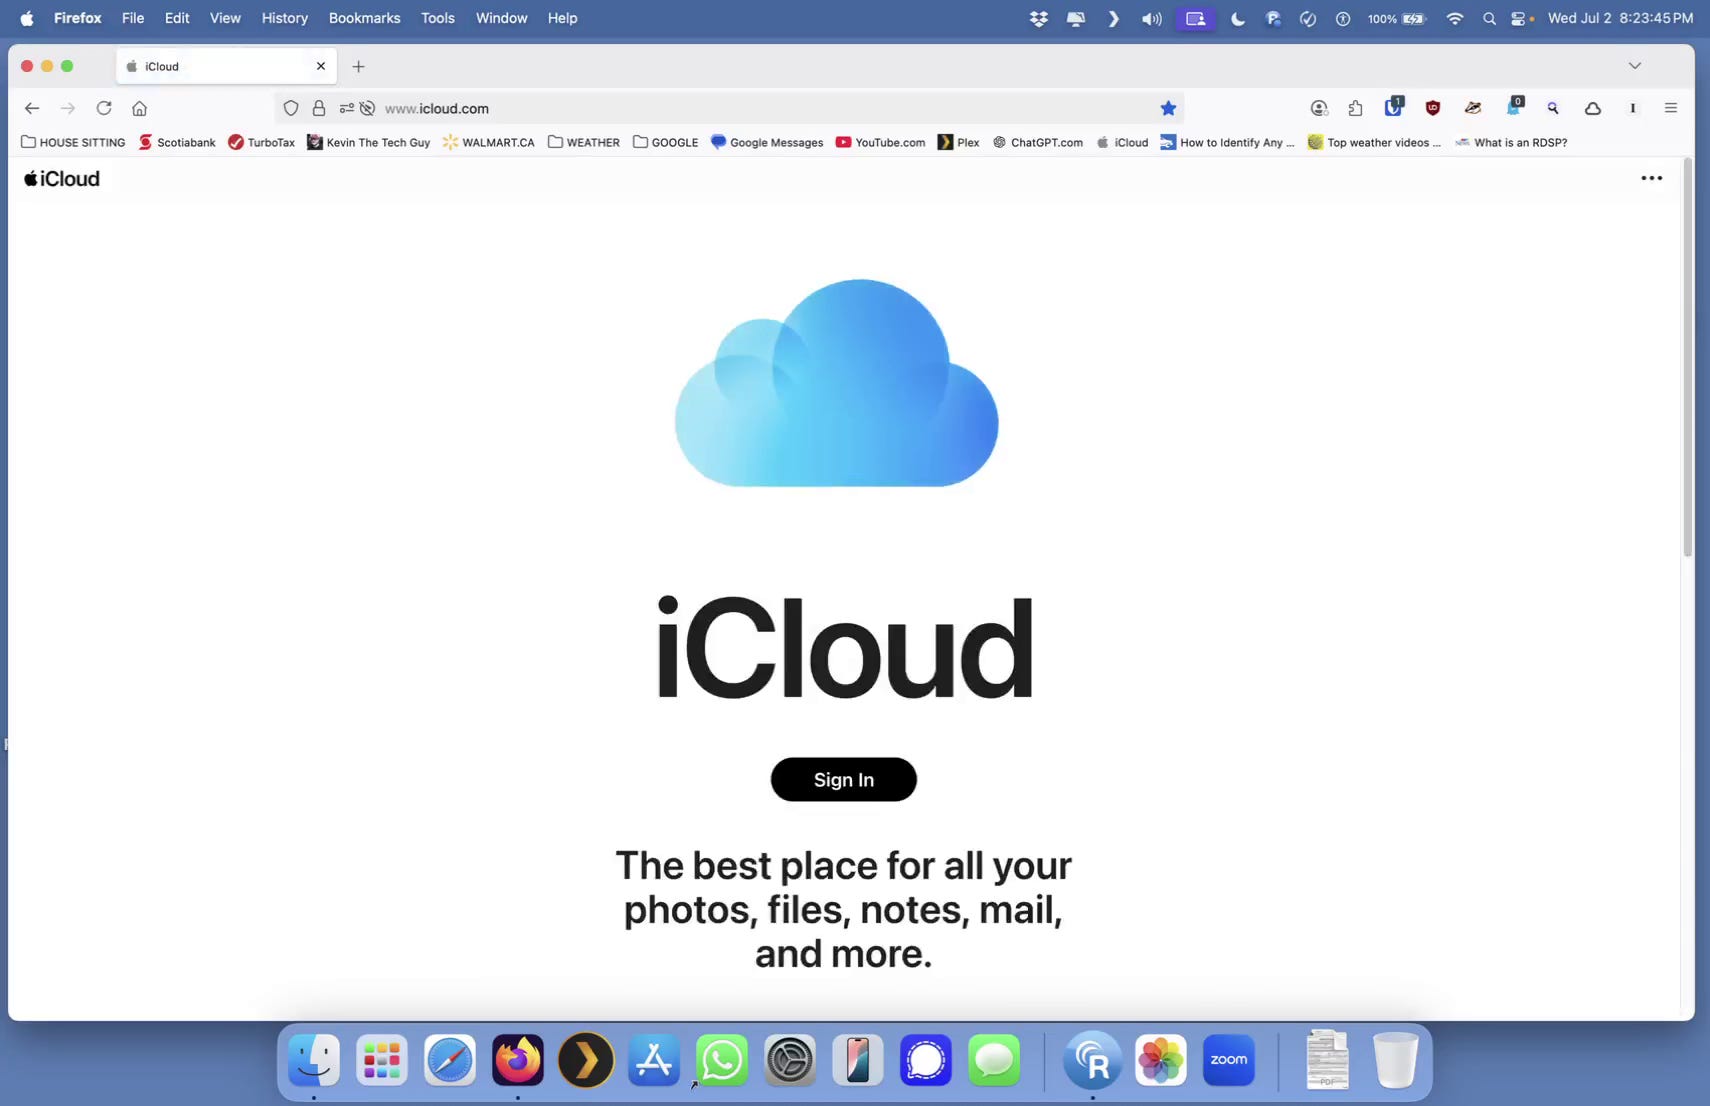
Start by opening Firefox or your preferred browser. It should open on your home page.
If iCloud.com is saved in the bookmarks toolbar, click it. If not, just type www.icloud.com into the address bar and press Enter.
Once the iCloud page appears, click the “Sign In” button.
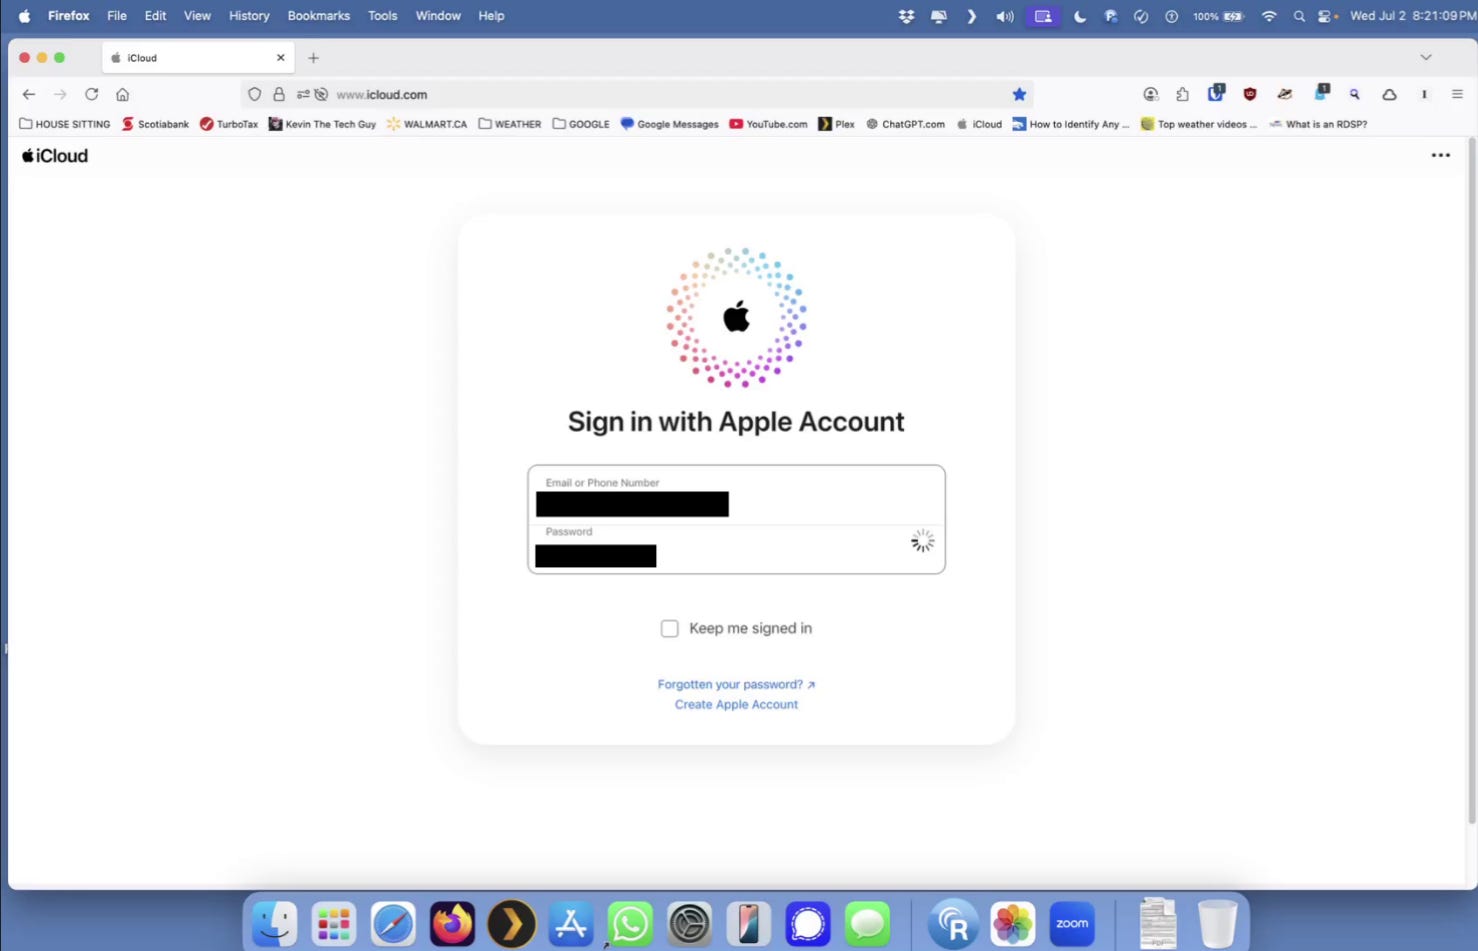
Step 2: Sign In with Your Apple ID
Your password manager may automatically fill in the login details. If not, type in your Apple ID email address and press Enter.
Next, enter your Apple ID password. If it doesn’t auto-fill, just type it in manually and press Enter again.
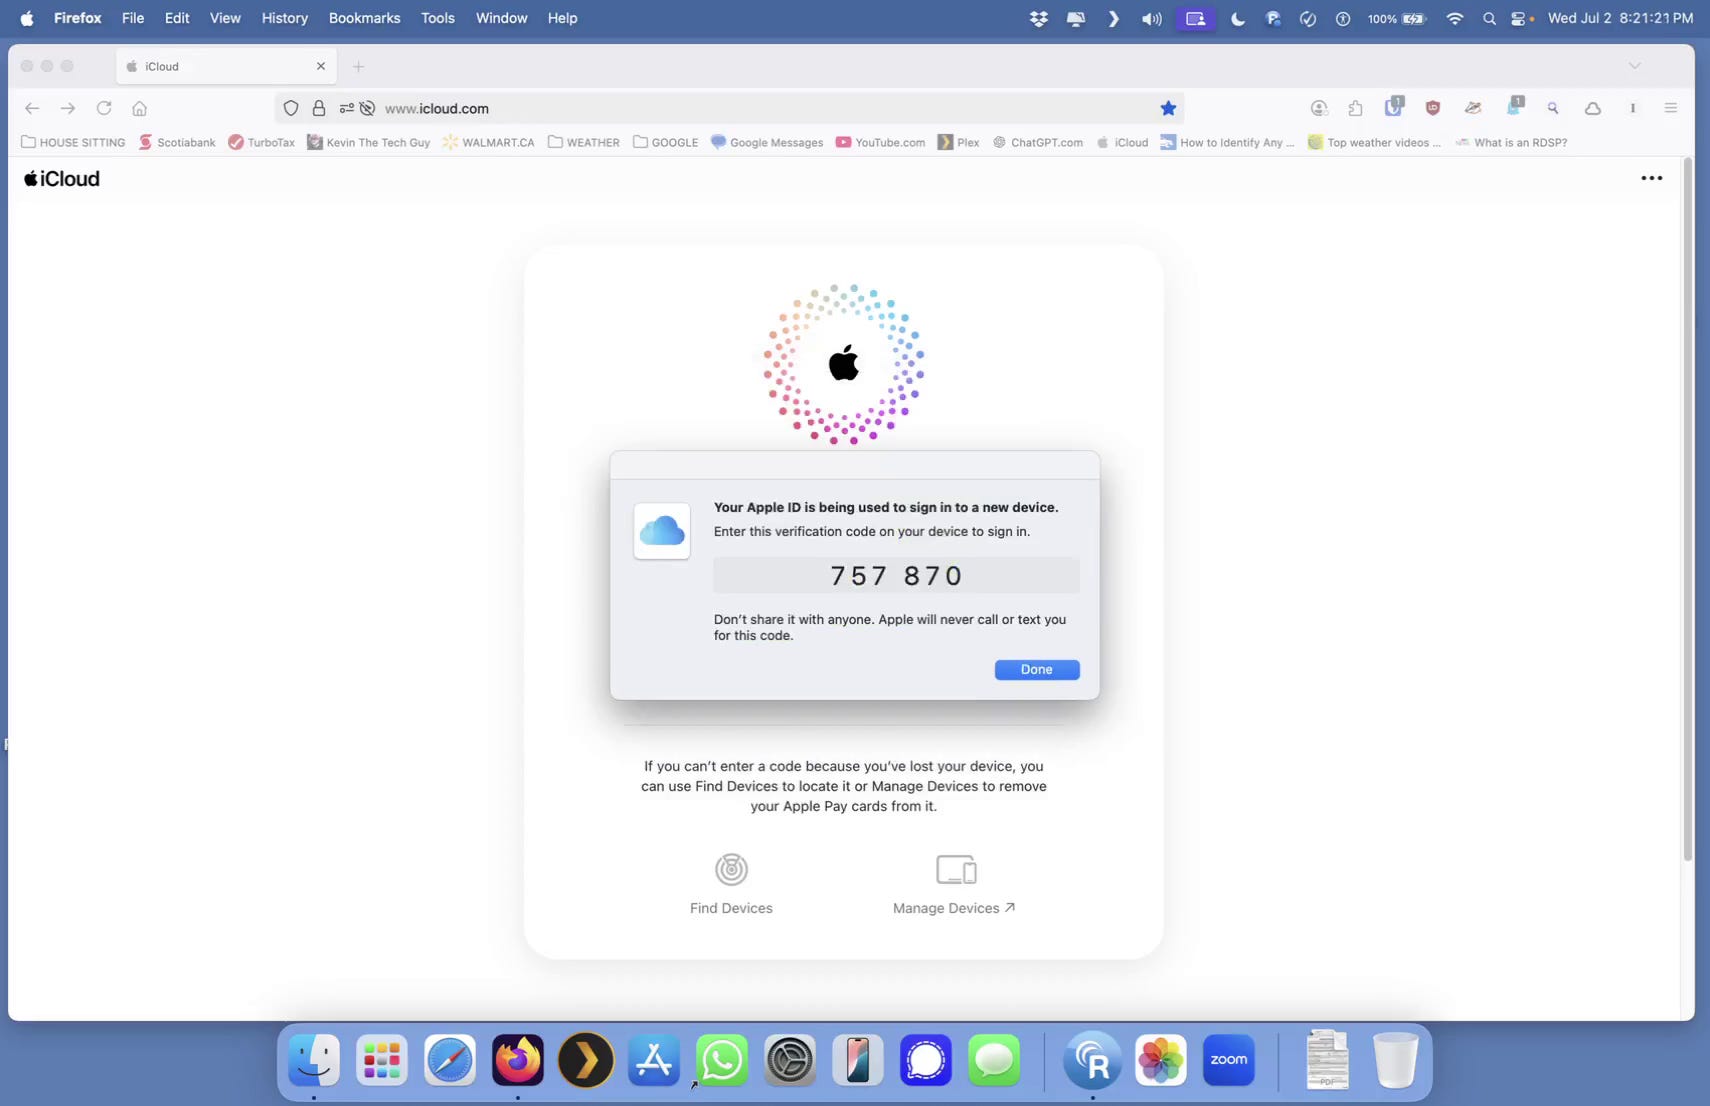
Step 3: Two-Factor Authentication

If it’s set up on your account, Apple will display a message stating that your account is being used to sign in to a new device. Click “Allow.”
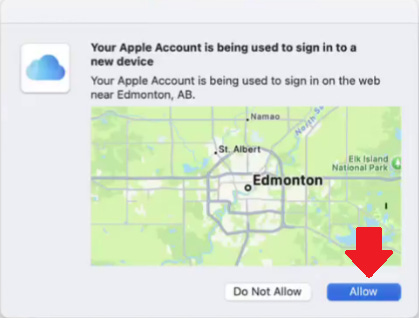
Then you’ll see a map and location (like the city you’re in or near). To confirm the sign-in location, click “Allow” again.
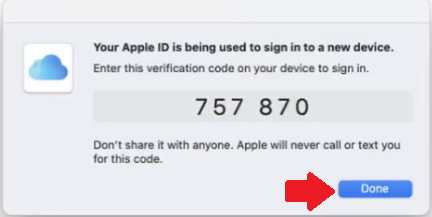
You’ll be shown a one-time 6-digit code. This code will never repeat. Quickly write this code down or remember it, then click “Done.”
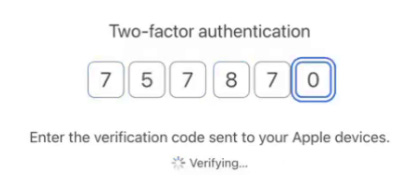
On the next screen, enter that code by clicking the small boxes and typing one digit in each.
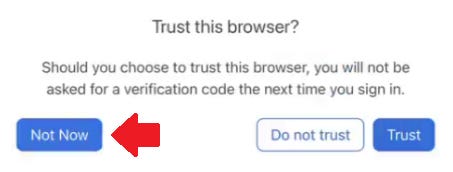
When asked whether to trust this browser, click “Not Now.” By “trusting” your device, the process will bypass important two-factor authentication methods for the sake of convenience, and we don’t want that.
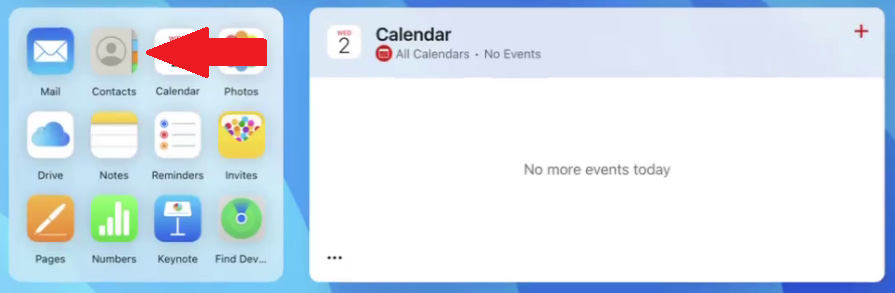
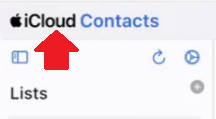
Step 4: Open the Contacts App in iCloud
Once you’re signed in, you’ll see the iCloud dashboard with app icons like Drive, Photos, and Notes. Scroll down to reveal more options, and click the Contacts icon to open your address book.
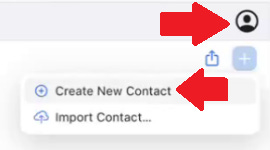
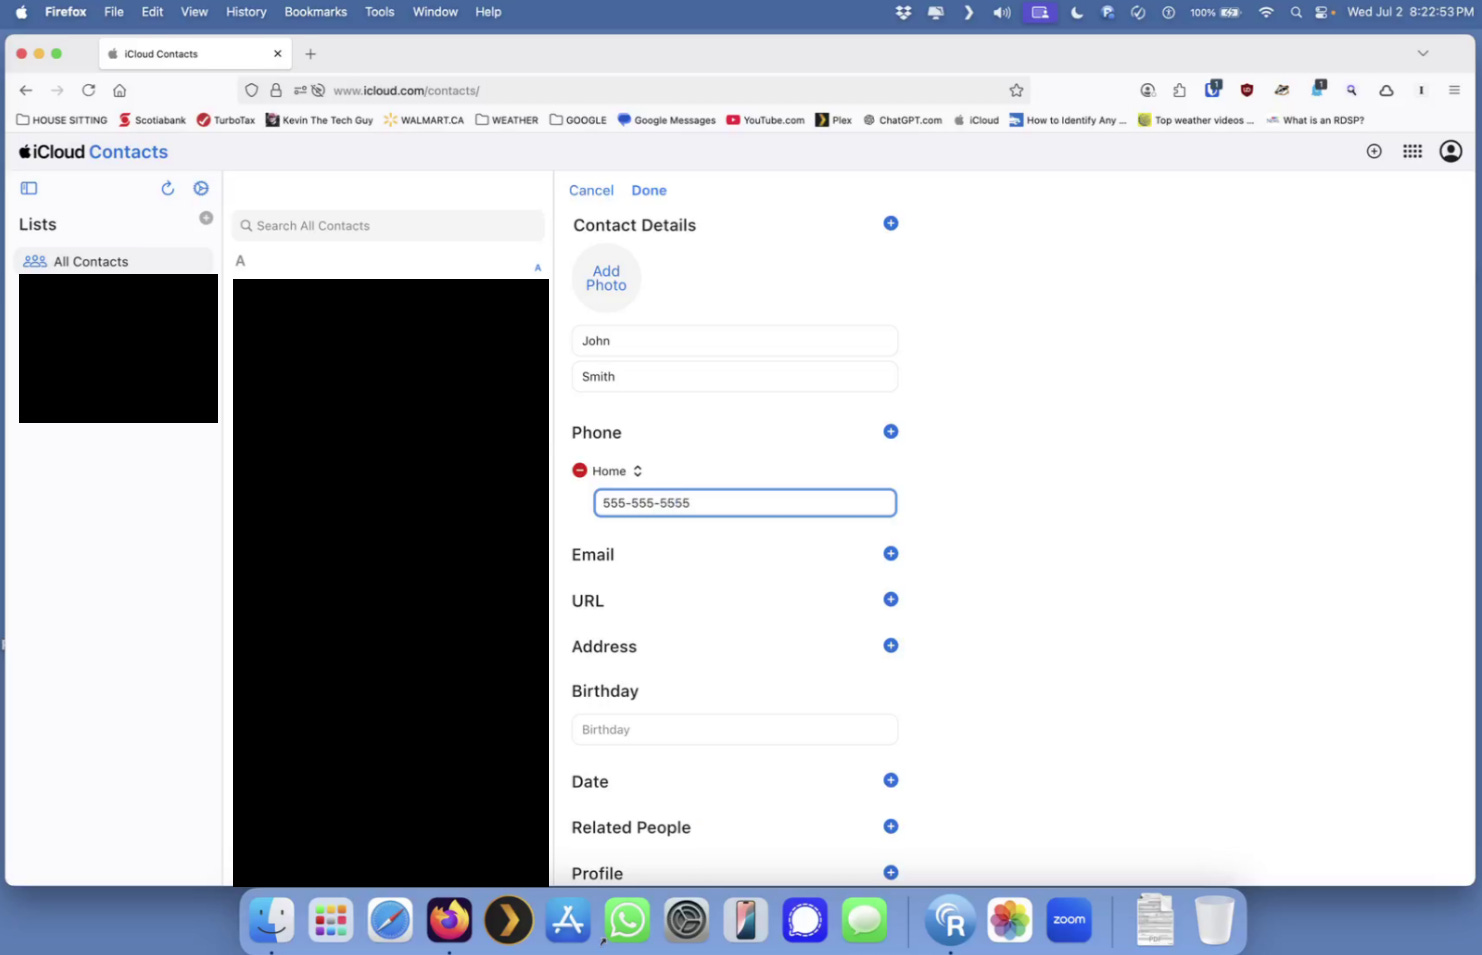
Step 5: Create a New Contact
In the top-left corner of the Contacts app, click the small “+” (plus) button, then choose “Create New Contact.”

A contact form will appear. Enter the person’s first name and last name. Scroll slightly to find the “+” next to Phone, click it, and type in their phone number. You can also click the “+” buttons next to Email or other fields to add more information.
When you're done, click the “Done” button near the top of the form to save the contact.
Step 6: Return to the Main iCloud Page and Sign Out
Once the contact is saved, you’ll see their full contact card. To return to the main iCloud dashboard, click “iCloud” in the top-left corner.
To sign out, click the small person icon in the top-right corner of the screen. When your name appears, click “Sign Out.”
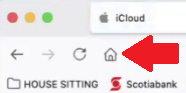
Step 7: Return to Your Home Page
After signing out, you’ll be returned to the public iCloud homepage. To return to your usual starting point, click the Home button (a house icon located near the top-left). This will return you to Startpage.com or your usual homepage.
I mention this because some of my clients, and even my Mom, have a certain routine, and it causes them anxiety if they don’t start from the same place each time. In this case, on their home page in Firefox.
And That’s It!
You’ve successfully added a new contact to your iCloud address book, and it will now appear automatically on your iPhone. This method is especially useful for individuals who prefer working on a larger screen or find it easier to type on a full keyboard.
If this guide was helpful, consider printing it and keeping a copy nearby for future reference when you need to update your contacts.
🔹 Download the Checklist
Want a quick version of this guide to print or keep handy?
Thank you so much for being a paid subscriber Your support makes my work possible.