
How to Add and Use the Bookmarks Toolbar in Firefox
If your bookmarks keep disappearing into menus, here’s how to make Firefox show your most-used sites right up front with the Bookmarks Toolbar.


I’m Kevin The Tech Guy, and in this detailed blog post and video, I’m going to show you how to turn on the Bookmarks Toolbar in Firefox, how to add bookmarks to it, and why this simple setup can make using your browser a lot easier. I use this toolbar every day, and I’ve helped many people, including family, and clients, get more out of Firefox just by enabling this one feature.
If you've ever found yourself digging through a messy list of saved links, this guide is for you.
What Is the Bookmarks Toolbar and Why Use It?
The Bookmarks Toolbar is a dedicated space in Firefox that displays your most-used bookmarks right below the address bar. Unlike the main Bookmarks Menu, which can become cluttered and buried in menus, the toolbar gives you one-click access to your go-to sites. I use it as a quick-launch area for the sites I visit daily—things like Google Docs, bill payment pages, and other tools specific to my workflow.
How to Turn On the Bookmarks Toolbar
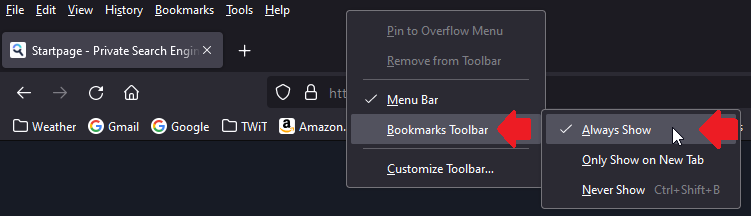
By default, the Bookmarks Toolbar isn’t turned on in Firefox. You’ll need to enable it manually. Here’s how:
Right-click on any empty area above your open tabs or above the address bar.
Hover over “Bookmarks Toolbar.”
Click “Always Show.”
Once enabled, you’ll see it appear below the website address bar and open browser tabs.
Adding a Bookmark to the Toolbar
To add a bookmark, you first need to decide how you’re accessing the bookmarks menu.
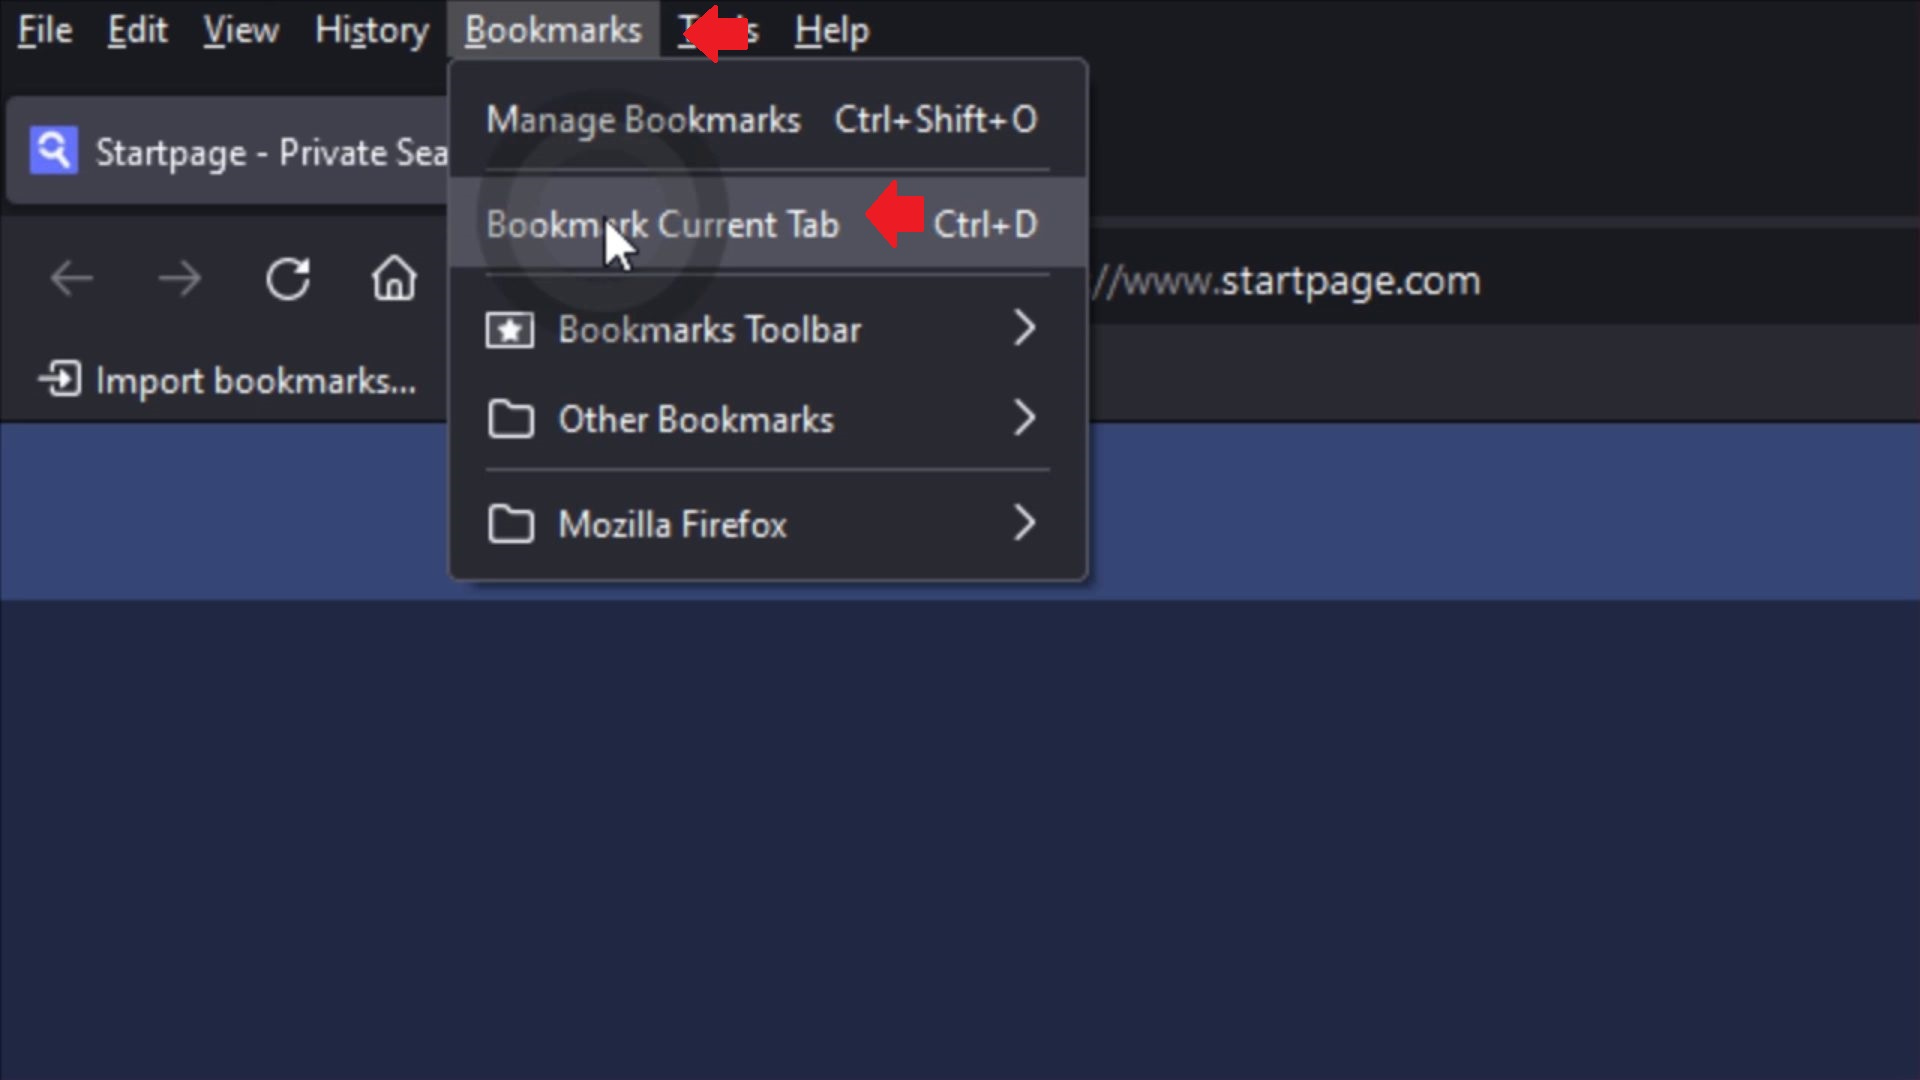
If you have the traditional menu bar enabled (with File, Edit, View, Bookmarks, etc.), click on Bookmarks, then Bookmark Current Tab.
If you don’t see that menu, right-click in the same area above the tabs and enable the Menu Bar first.
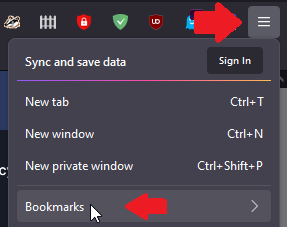
Alternatively, you can click the three stacked lines (the “hamburger” icon) in the top-right corner of Firefox. From there:
Click Bookmarks.
Click Bookmark Current Tab.
This brings up the bookmark editing window.
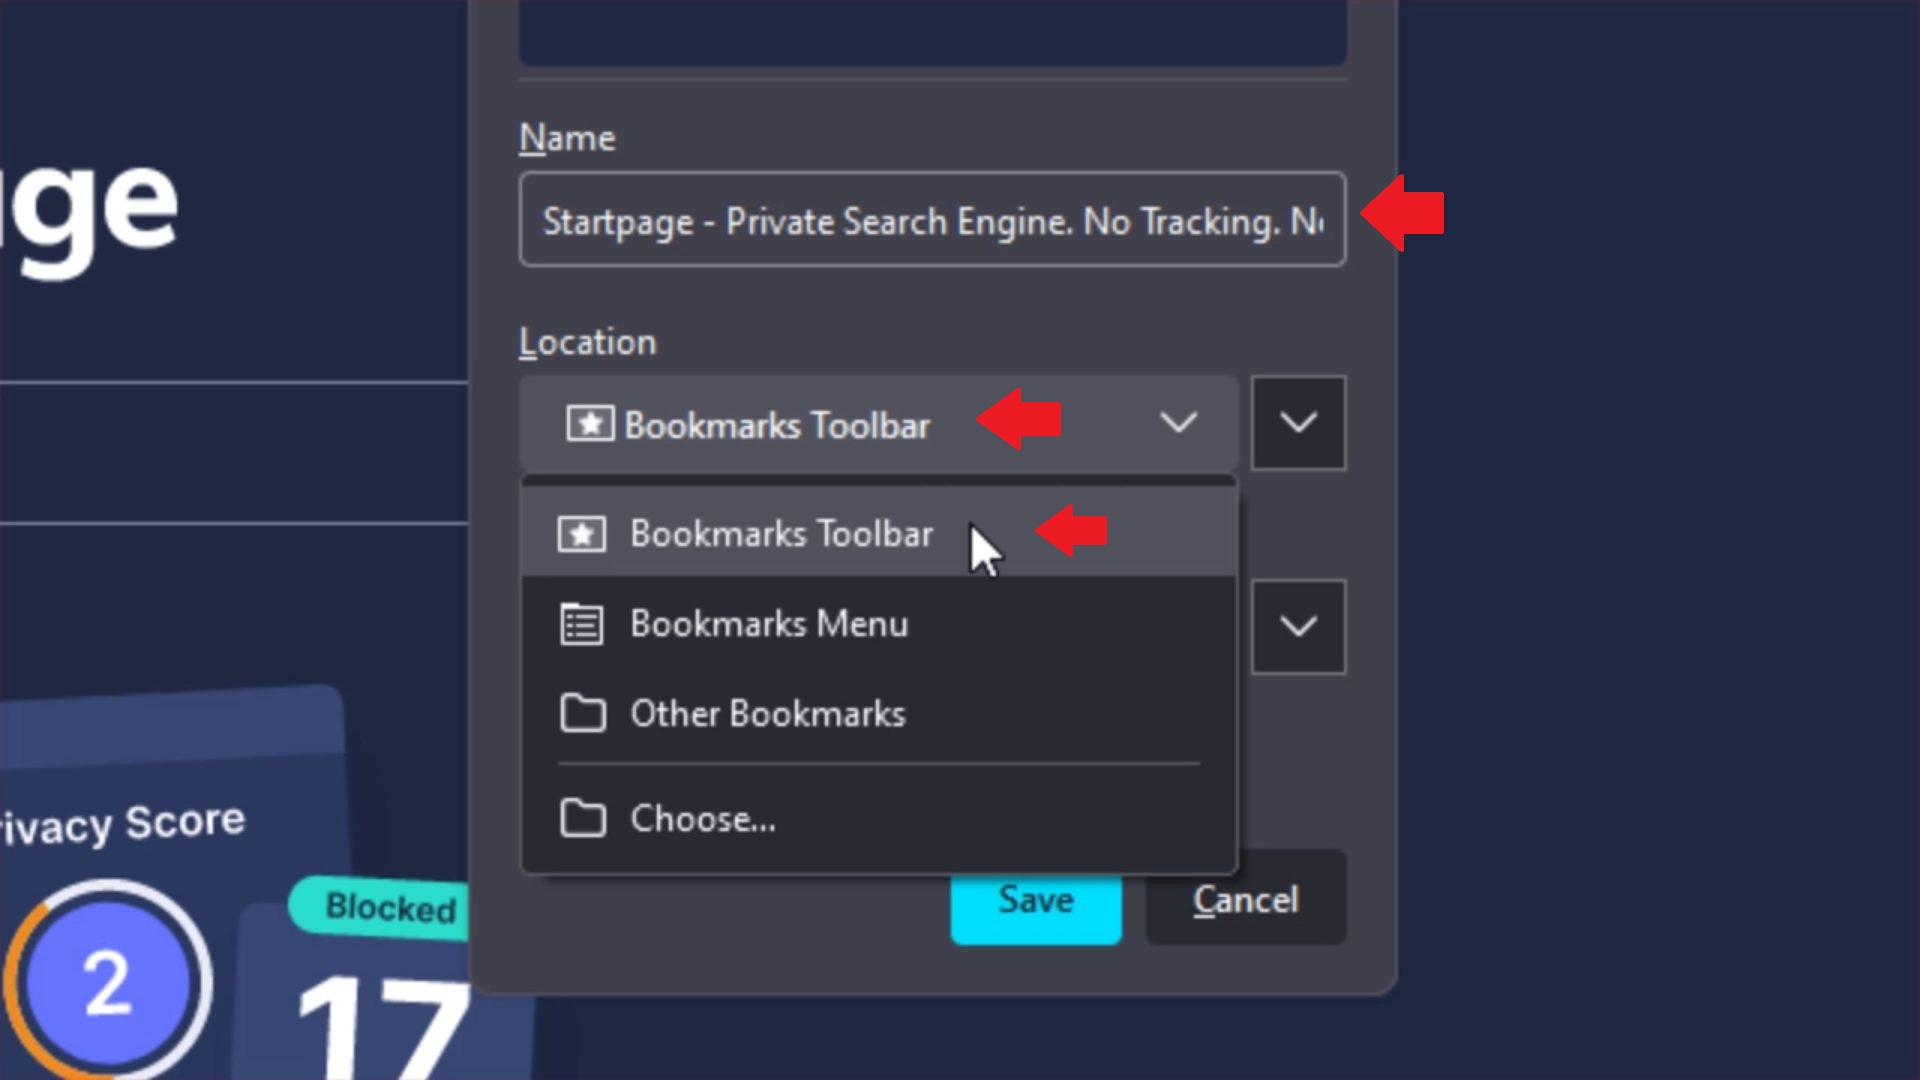
Choosing the Right Location
This part is important. In the bookmark editing window, look for the “Location” dropdown, and can trip people up. This tells Firefox where to save the bookmark.
If you leave it set to “Bookmarks Menu,” the bookmark won’t show up on the toolbar. Change it to “Bookmarks Toolbar.” This will ensure that the link is visible on the bar you just enabled.
While you’re here, you can also rename the bookmark. Shorter names are better because longer titles get cut off on the toolbar. For example, instead of “Online Tools and Payments for the City of Whatever,” you might just call it “City Payments.”
Once you’ve done that, click Save. Your new bookmark will now appear on the toolbar, ready for quick access.
Organizing the Toolbar (Optional)
At first glance, you might think that you can only fit so many bookmarks on the toolbar, when in fact it’s just an extension of your existing bookmarks. Since the toolbar tends to be reserved for frequently accessed bookmarks, many non-tech-savvy people, at least in my experience, don’t bother organizing it in an effort to add more than a few links.
If you want to take it further, you can add folders to the toolbar, just like you would in the Bookmarks Menu. This is helpful if you’ve got more bookmarks than will comfortably fit across the top of your screen. You can create folders by opening the Bookmarks Manager, then organizing and dragging bookmarks into them.
But honestly, this part isn’t for everyone. You probably don't need folders if you visit only a handful of sites regularly, like my Mom does. A few well-placed bookmarks on the toolbar are more than enough.
Why This Makes a Difference
I've seen how frustrating it can be for people when they can't find their saved pages at a moment’s notice and have to scramble to find the one they’re looking for.
I’ve had this come up with clients, and even with my Mom. No disrespect to either.
When it comes to everyday tasks like paying bills, checking email, or managing appointments, a few extra clicks can make the difference between ease and frustration.
Setting up the toolbar properly puts your top sites exactly where you need them, and once you get used to it, you’ll wonder why it wasn’t on all along.
Final Thoughts
If you’ve been relying on the bookmarks menu or searching for the same pages over and over, the Bookmarks Toolbar is worth using. It’s one of those features that takes two minutes to set up and can save you time every single day. The basic setup is all you’ll need for most people, but you can go deeper if you want to customize it further.
If you found this helpful, feel free to leave a comment, or support my work by buying me a coffee.