
The First Things You Should Do with Your New Windows 11 Computer
It’s always very exciting to bring a new system home to replace the aging one that has seen better days. Here are the things I recommend doing in terms of setting up your new PC!

Congratulations on your new computer! It’s always very exciting to bring a new system home to replace the aging one that has seen better days. Contemporary technology opens more possibilities and capabilities. Now, to get the most out of your system and get more done! Since it’s a new computer, it most likely came with Windows 11. Here are the steps I recommend taking to set up your new PC.
This blog post summarizes my more detailed First Things You Should Do When Setting Up Windows 11 posts.
If you find value in my posts, please consider supporting my work.
Your new PC is a blank slate in terms of how you’ll use it, but Windows 11 isn’t always set up the way you might want. Here’s how I get rid of the junk and properly set things up from the very start.
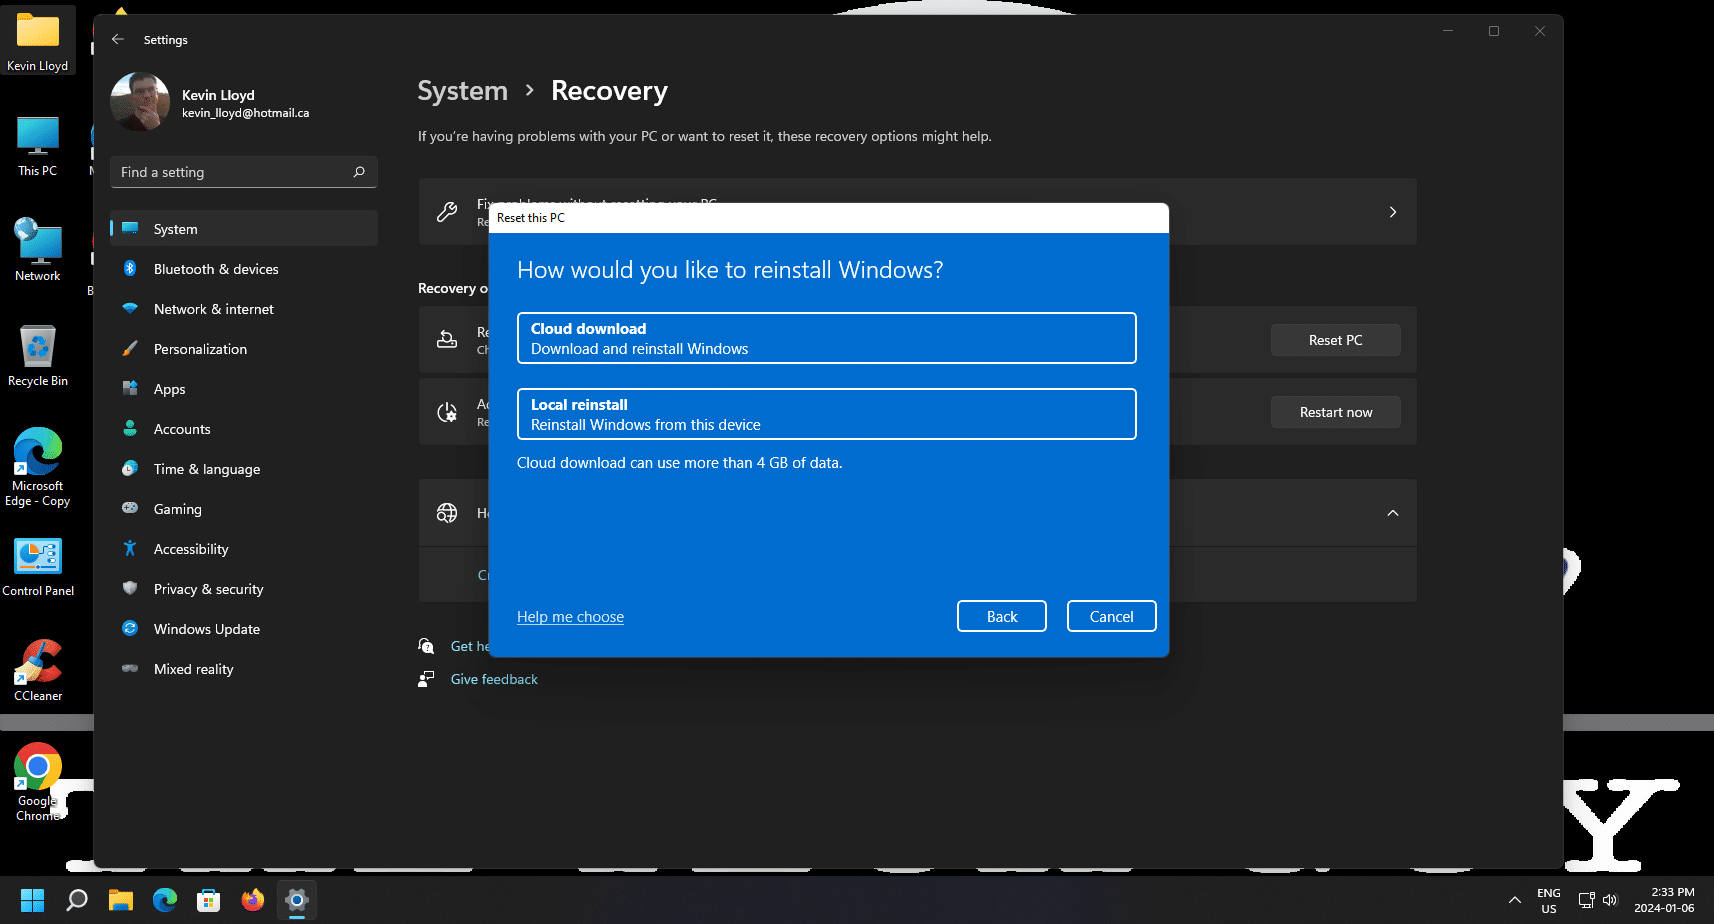
Factory Reset Windows 11
If your computer came with Windows 11, possibly from a big box store, it's likely full of bundled partner software and configuration settings you didn’t ask for. I don’t like it when someone messes with my system without asking, and I suspect you may feel the same way.
That’s why the very first thing I recommend is to reset Windows 11. Use the Cloud Download option along with "Erase Everything". This provides a clean, updated version of Windows 11, without the unnecessary extras. It’s the fastest way to make sure your system is fresh and untouched.
Some advanced users might prefer a method that skips the reset entirely by re-running the Windows setup experience with lighter defaults. XDA Developers outlines that method here: Read it on XDA.
Using their steps means that everything in your current user account remains intact, without losing your existing data or files.
It works by triggering the out-of-box setup process again using a built-in Windows tool. You choose a region like Portugal (which triggers lighter defaults under EU law), but you can still select English as the language. This creates a local account, resulting in a much less cluttered system.
That said, it requires using the command line and navigating a few technical steps. Unless you’re comfortable with that, I still recommend the clean reset method I’ve outlined above. Since the reset right off the bat means your files aren’t on the computer yet, that’s truly the time to do it.

Windows Update
Your new computer may have been sitting on a store shelf or in a warehouse for some time. The latest Windows updates have likely not been applied, so it’s essential to get fully up to date.
To check for updates:
Open the Start Menu
Click Settings (gear icon)
On the bottom left, click Windows Update
Click Check for updates, and when prompted, click Restart
After restarting, return to Windows Update and run it again. Repeat until it says, “You’re up to date.”
Major updates like 23H2 or 24H2 are sometimes listed under optional updates, which only appear when available. You can also check Advanced Options to find them manually. I recommend installing them, but please complete the required updates first.
In Advanced Options, I suggest enabling these two settings:
Receive updates for other Microsoft products
Notify me when a restart is required to finish updating
That second one matters most. If you don’t turn it on, Windows may restart your computer without warning, even if you're in the middle of something.
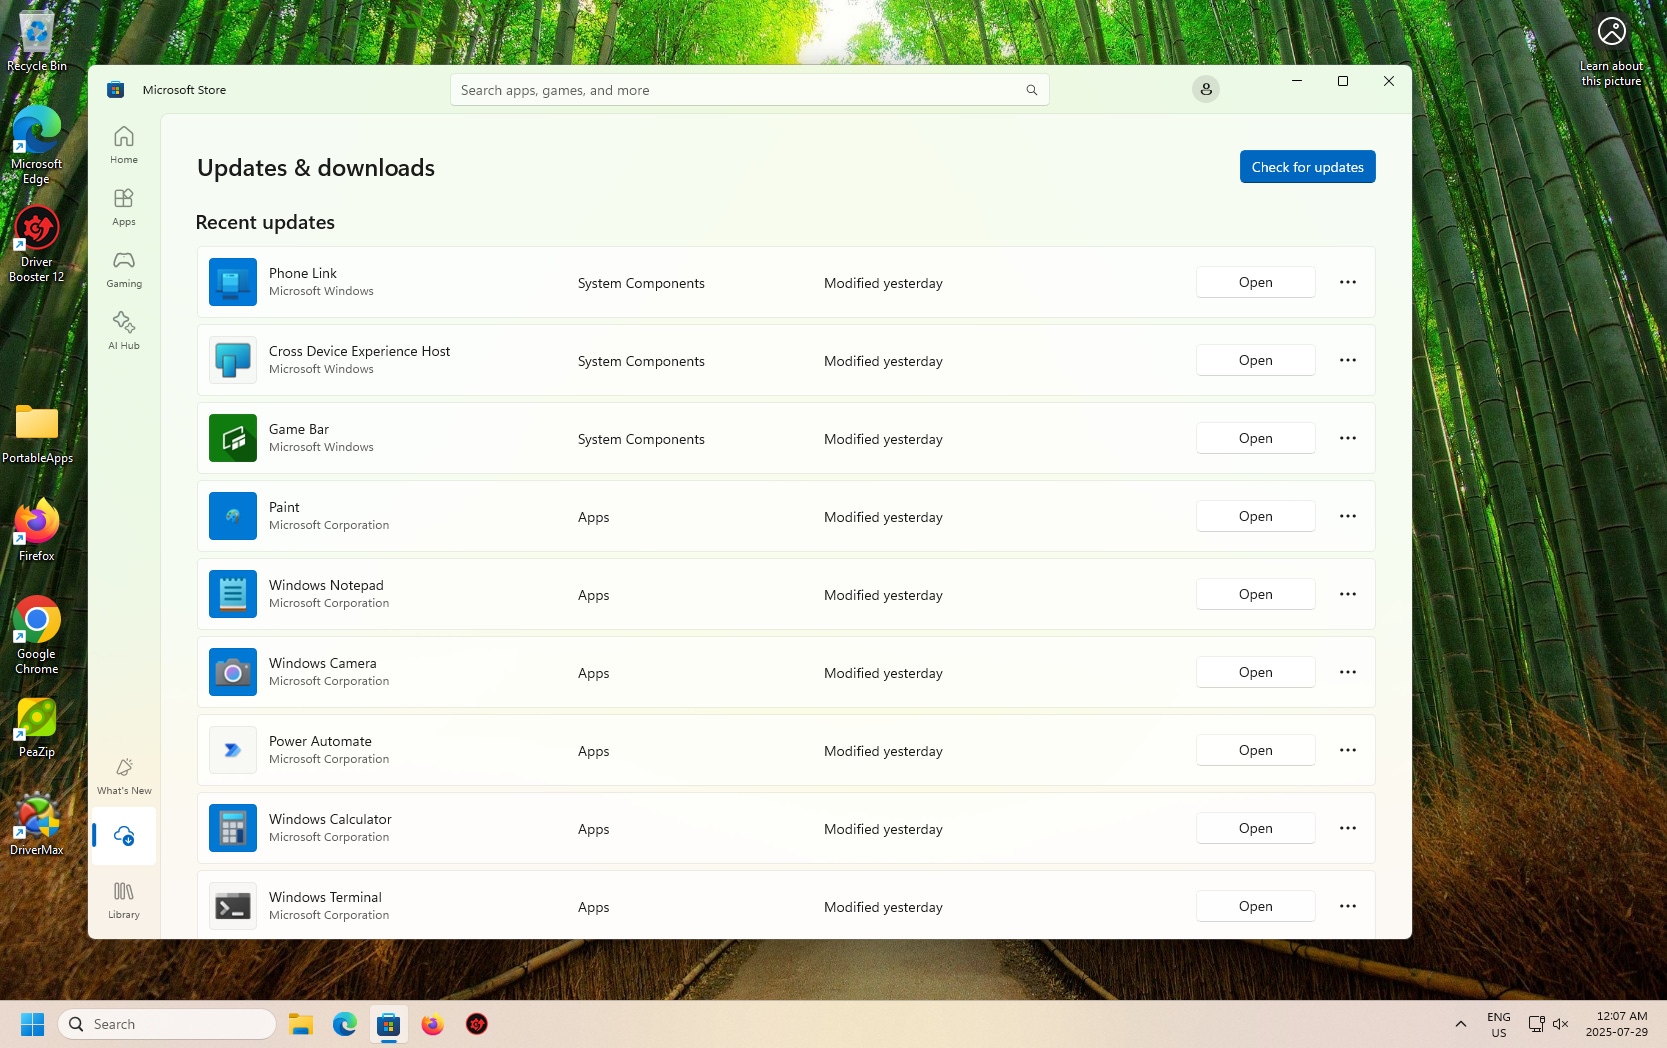
Microsoft Store App Updates
This step is often overlooked, even by tech support. Windows 11 includes apps from the Microsoft Store that don’t get updated through Windows Update.
To update Microsoft Store apps:
Open the Microsoft Store from the Start Menu
Click Library in the bottom-left corner
Click Get updates and wait for the process to finish
Almost everything in the default installation will have updates available, and this can take some time. Let it finish.
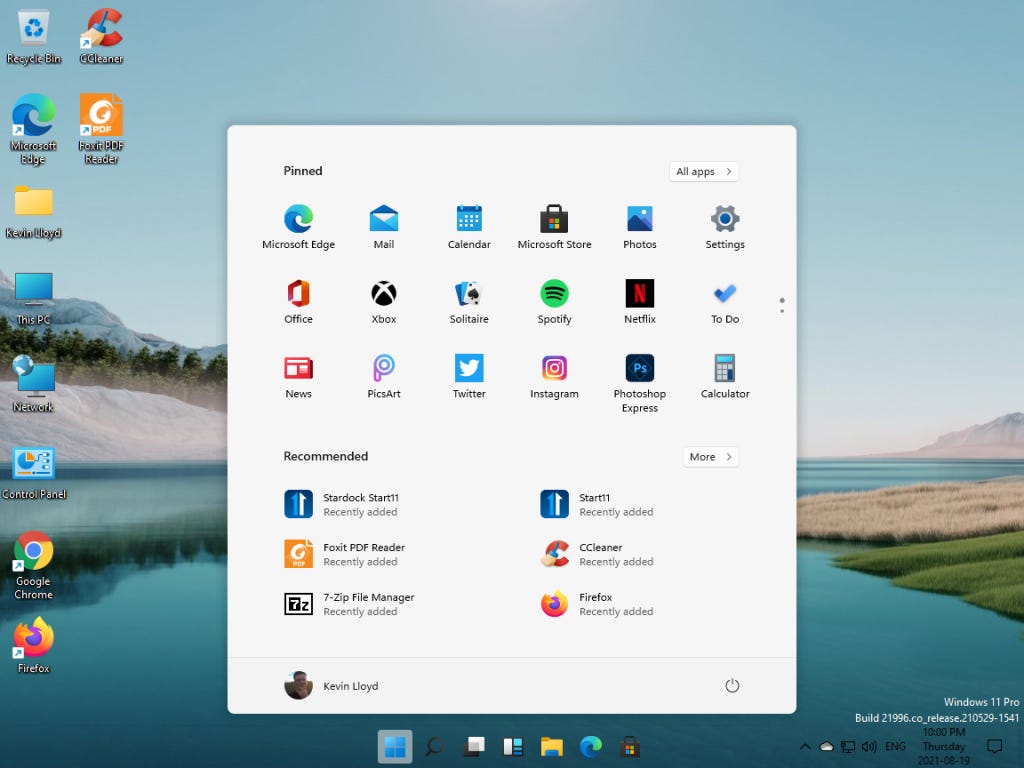
Taskbar and Start Menu
The Taskbar is the row of icons at the bottom center of your screen. It starts with the Start Menu, followed by Search, File Explorer, Edge, the App Store, and more.
The default Start Menu wastes space and shows “Recommended” items, which often include app ads and suggestions. The “All apps” list is tiny and awkward to use.
To customize the Start Menu:
Right-click an empty area of the Taskbar
Click Taskbar Settings
Go to Personalization > Start
Adjust the layout as needed
You can also right-click and remove pinned apps you don’t use.
To go further, I recommend replacing the Start Menu entirely:
Start11 ($7 one-time) is my top pick—it’s clean, reliable, and makes the Start Menu usable again
Open Shell is a solid free alternative if you prefer not to pay
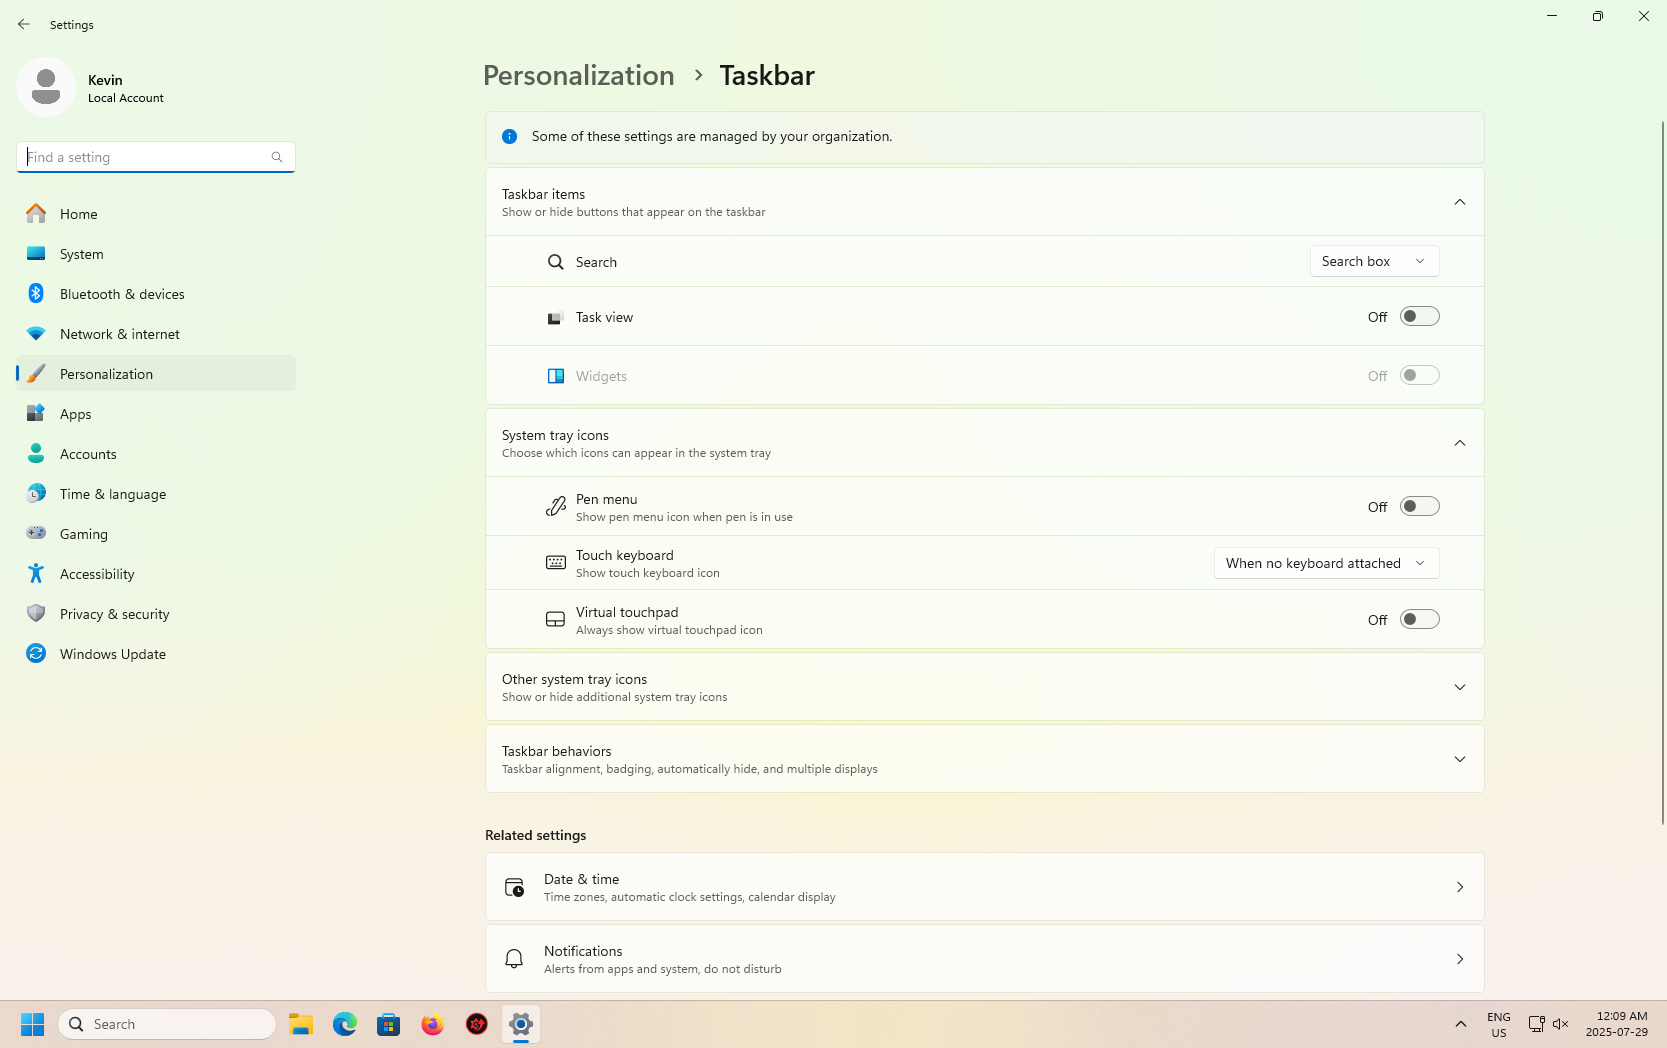
To clean up the Taskbar:
Go to Settings > Personalization > Taskbar
Turn off features you don’t want like Widgets and Chat
Scroll down to review and disable additional toggles
This wraps up the first set of changes I always make. In Part 2, I’ll walk you through restoring classic desktop icons, removing pre-installed software, and disabling programs from launching at startup.
Thank you for reading. Please strongly consider supporting my work.